Application Branding (Logged-in Users)
Application Branding controls the interface, features, and appearance for users who log directly into DashboardFox to access the Dashboard, Library, and Builder sections. This is where you configure the full DashboardFox experience - and you can create branded experiences for different departments, user groups, or use cases.
When Application Branding Applies
Application Branding takes effect when:
- Users log into DashboardFox directly (not anonymous/guest access)
- Users interact with the Dashboard, Library, and Builder interfaces
- Users access the full DashboardFox application (not just embedded content)
This is the comprehensive branding that shapes how users experience DashboardFox as a complete platform.
Branding Policy Limits
By default, DashboardFox includes 1 Application Branding policy. This policy can be assigned to all users, or to specific groups and individual users.
Need multiple policies? If your organization requires different branding for different departments, external partners, or user groups, additional Application Branding policies are available with licensing upgrades. Contact team@dashboardfox.com to discuss your requirements.
When you reach your policy limit and try to create another, you'll see the error: "DashboardFox only allows one branding record." To create a new policy within your current limits, you can disable (toggle off Active Status) or delete your existing policy first.
Before You Start: Set Your Product Name
Before diving into Application Branding policies, set a global product name that appears in browser tabs for all logged-in users.
Navigate to Settings → Server Settings
Find the Application Settings section and locate the Product Name field.
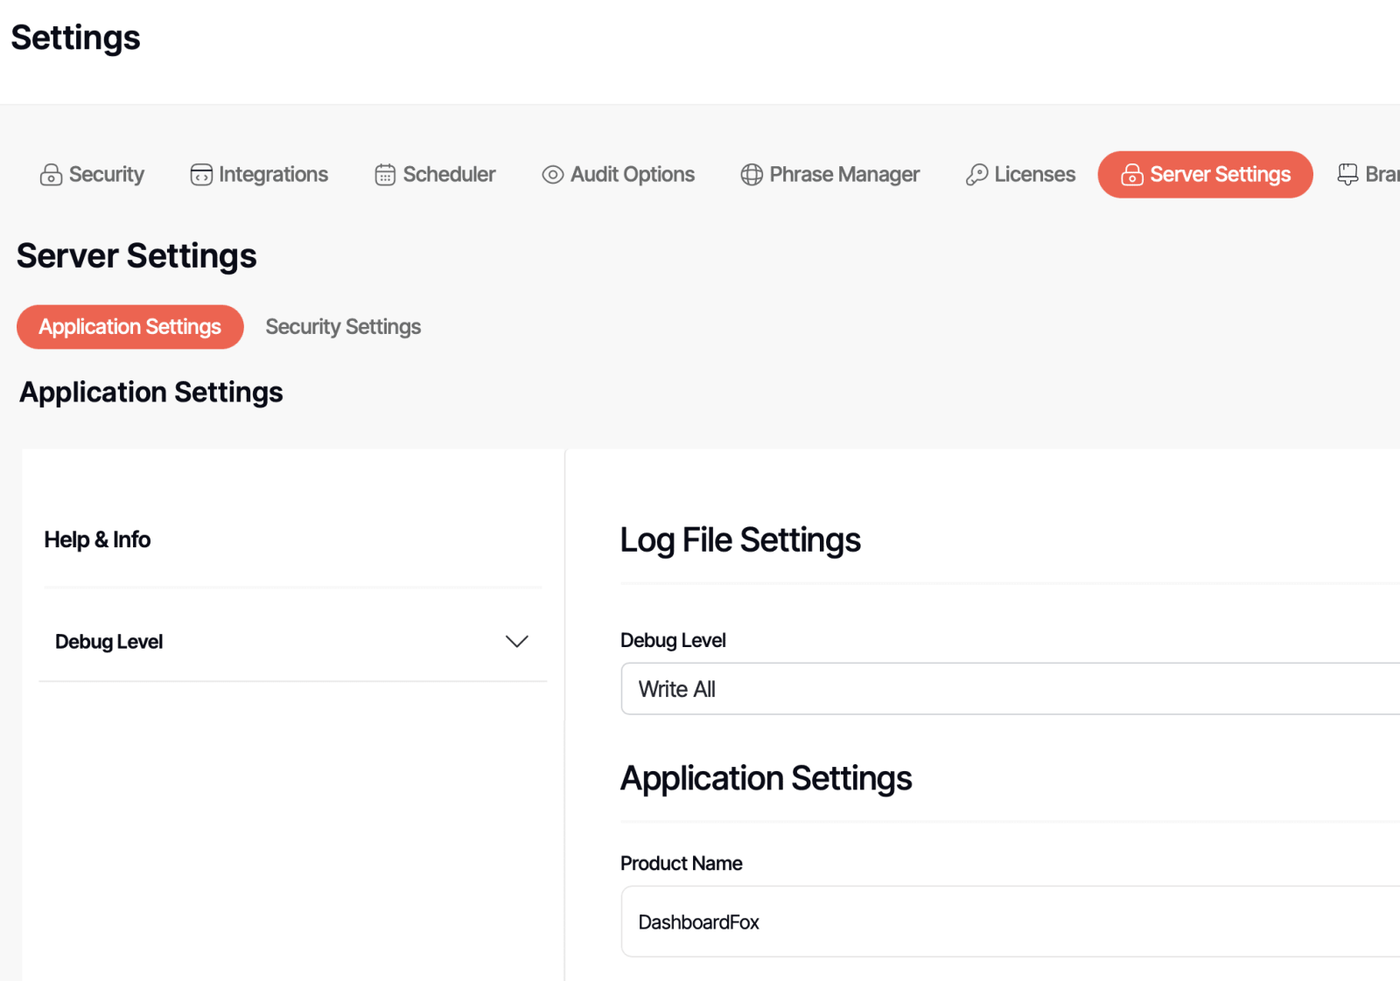
What to enter: This should be your organization's name, a department name like "Finance Analytics," or something generic like "Reporting" or "Business Intelligence" since it applies globally to all users.
Example: If your organization is "Acme Corporation," entering "Acme Analytics" means users will see "Acme Analytics" in their browser tab instead of "DashboardFox."
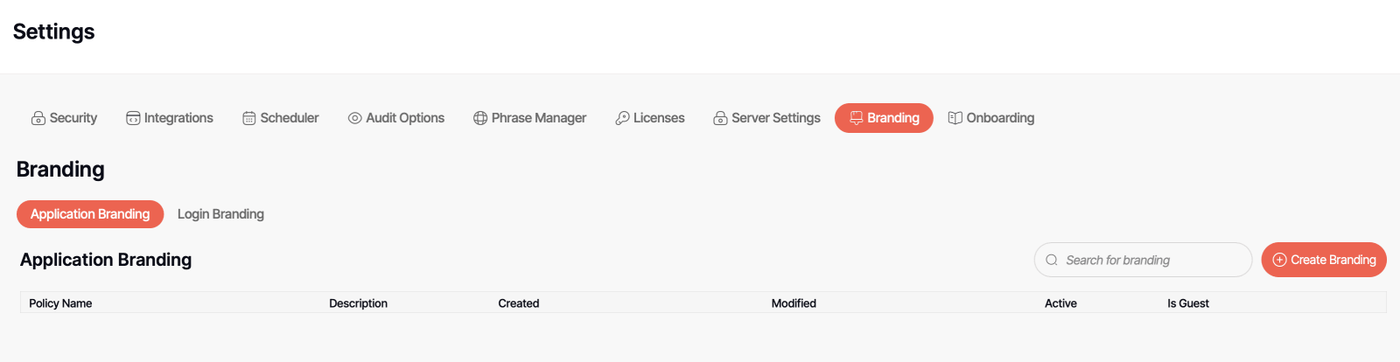
Creating Application Branding Policies
Navigate to Settings → Branding → Application Branding → Create Branding
Basic Policy Settings
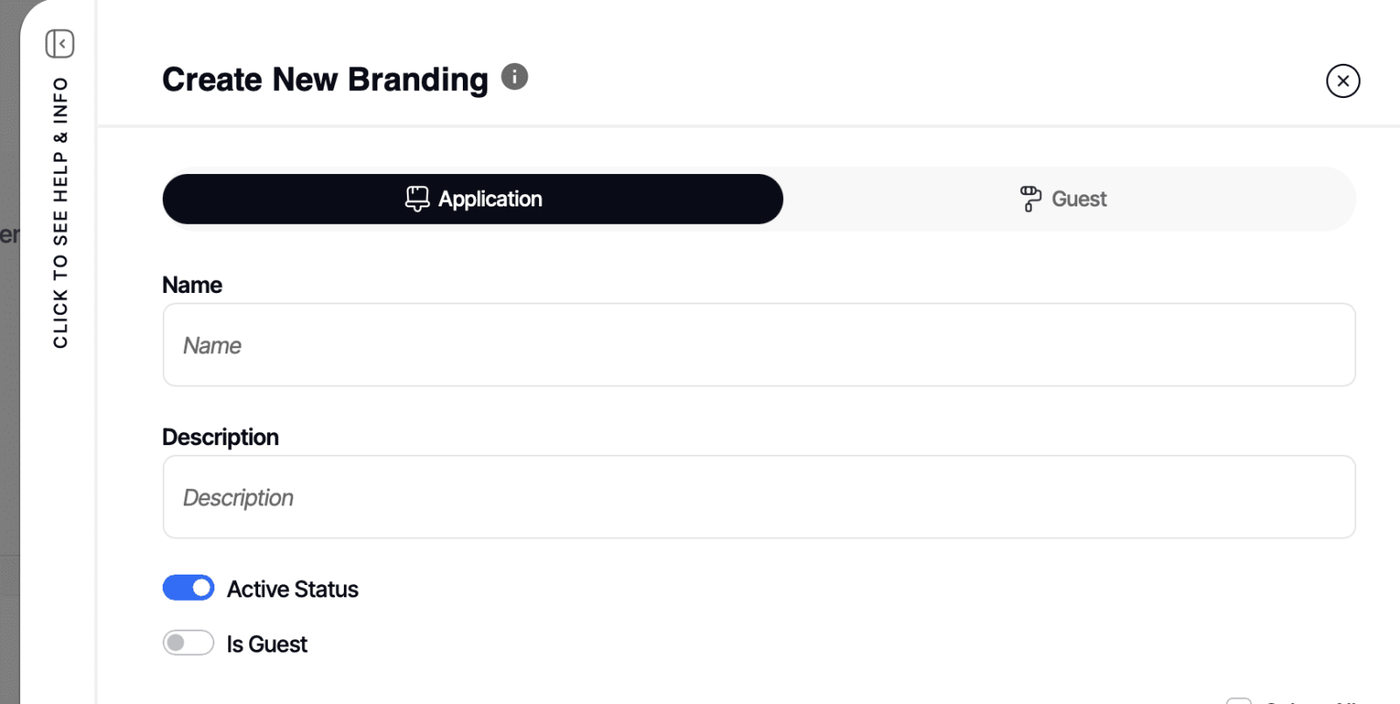
Name Give your policy a descriptive name that helps you identify it later (e.g., "Company-Wide Branding," "Finance Department," "External Partners").
Description Add details about what this policy is for and who it applies to. This helps other admins understand the purpose.
Active Status Toggle this ON to activate the policy or OFF to disable it without deleting.
Is Guest Toggle this OFF for Application Branding. (Toggle ON only when creating the single Guest Branding policy.)
Assigning the Policy
Scroll to the Assigned Groups and Assigned Users sections.
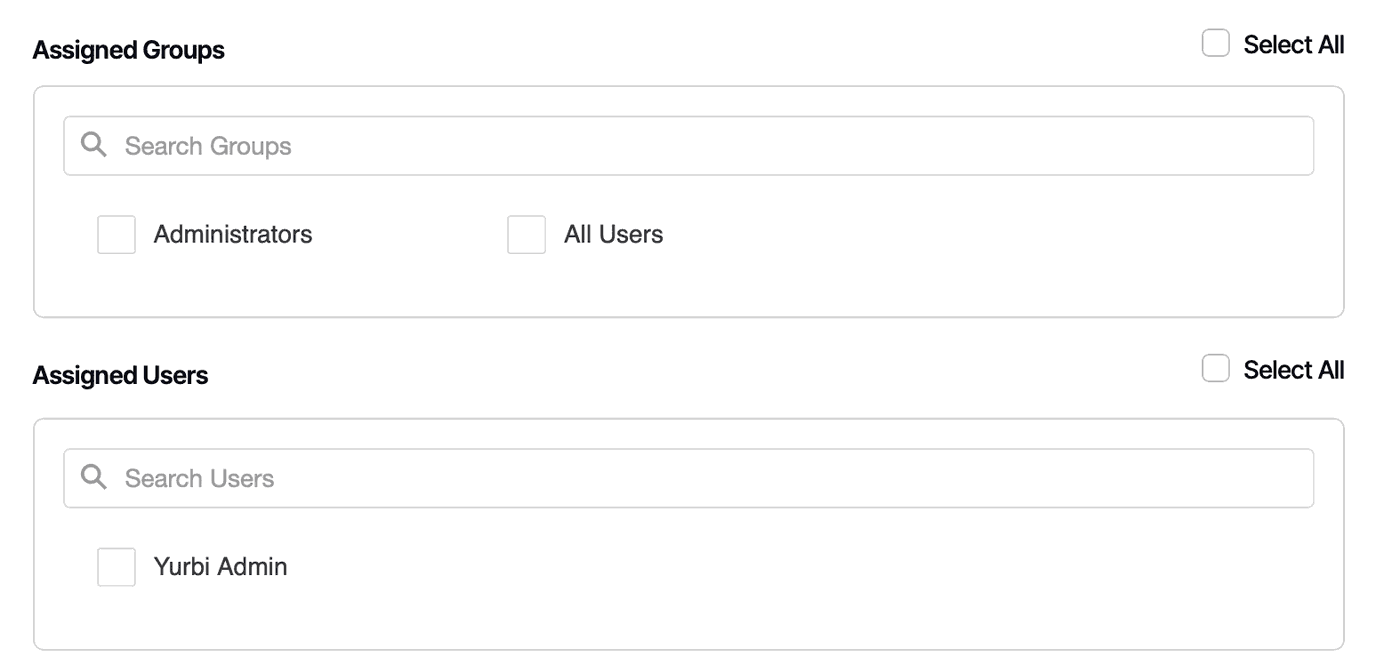
Assigning to Groups: All available groups appear as checkboxes. You can:
- Check ALL USERS to apply this policy to everyone (most common approach with single policy)
- Use SELECT ALL to check all groups, then uncheck specific ones (like your admin team)
- Use the search box to type a few letters and filter the list
- Manually check individual groups
Assigning to Individual Users: Same interface as groups. Useful for:
- Creating exceptions to group policies
- Testing new branding with specific users
- Special-case accounts
With a single policy: Most organizations assign their one policy to ALL USERS to provide consistent branding across the organization. If you need different groups to see different features or branding, contact team@dashboardfox.com about licensing additional policies.
Feature Options
Feature Options control the visual appearance and some high-level feature availability.

Primary Color The main accent color for buttons and interactive elements throughout the interface.
Secondary Color Used for secondary elements and accents.
Logo (Big and Small) Upload your logo or provide a link to it. DashboardFox will use the appropriate size based on where it's displayed.
Important: Supported formats are JPG, PNG, and SVG. WebP format is not currently supported.
Feature Toggles
Below the visual elements, you'll find these feature toggles (all enabled by default):
- Show Allow Anonymous - Display the option to create guest/anonymous reports
- Show Allow Embedding - Display the option to enable embedding for reports/dashboards
- Show View SQL - Show the ability to view the SQL query behind reports
- Show Send to Email - Display email sending options
- Show Schedule - Show scheduling functionality
Recommendations:
For users with Builder access: We recommend turning OFF these features:
- ❌ Show View SQL (prevents SQL exposure to non-technical users)
- ❌ Show Allow Anonymous (control public sharing centrally)
- ❌ Show Allow Embedding (control embedding permissions centrally)
If you're not enabling email/scheduling: Turn off:
- ❌ Show Send to Email
- ❌ Show Schedule
These recommendations keep the interface focused and prevent users from accessing features you're not supporting.
Sidebar Options
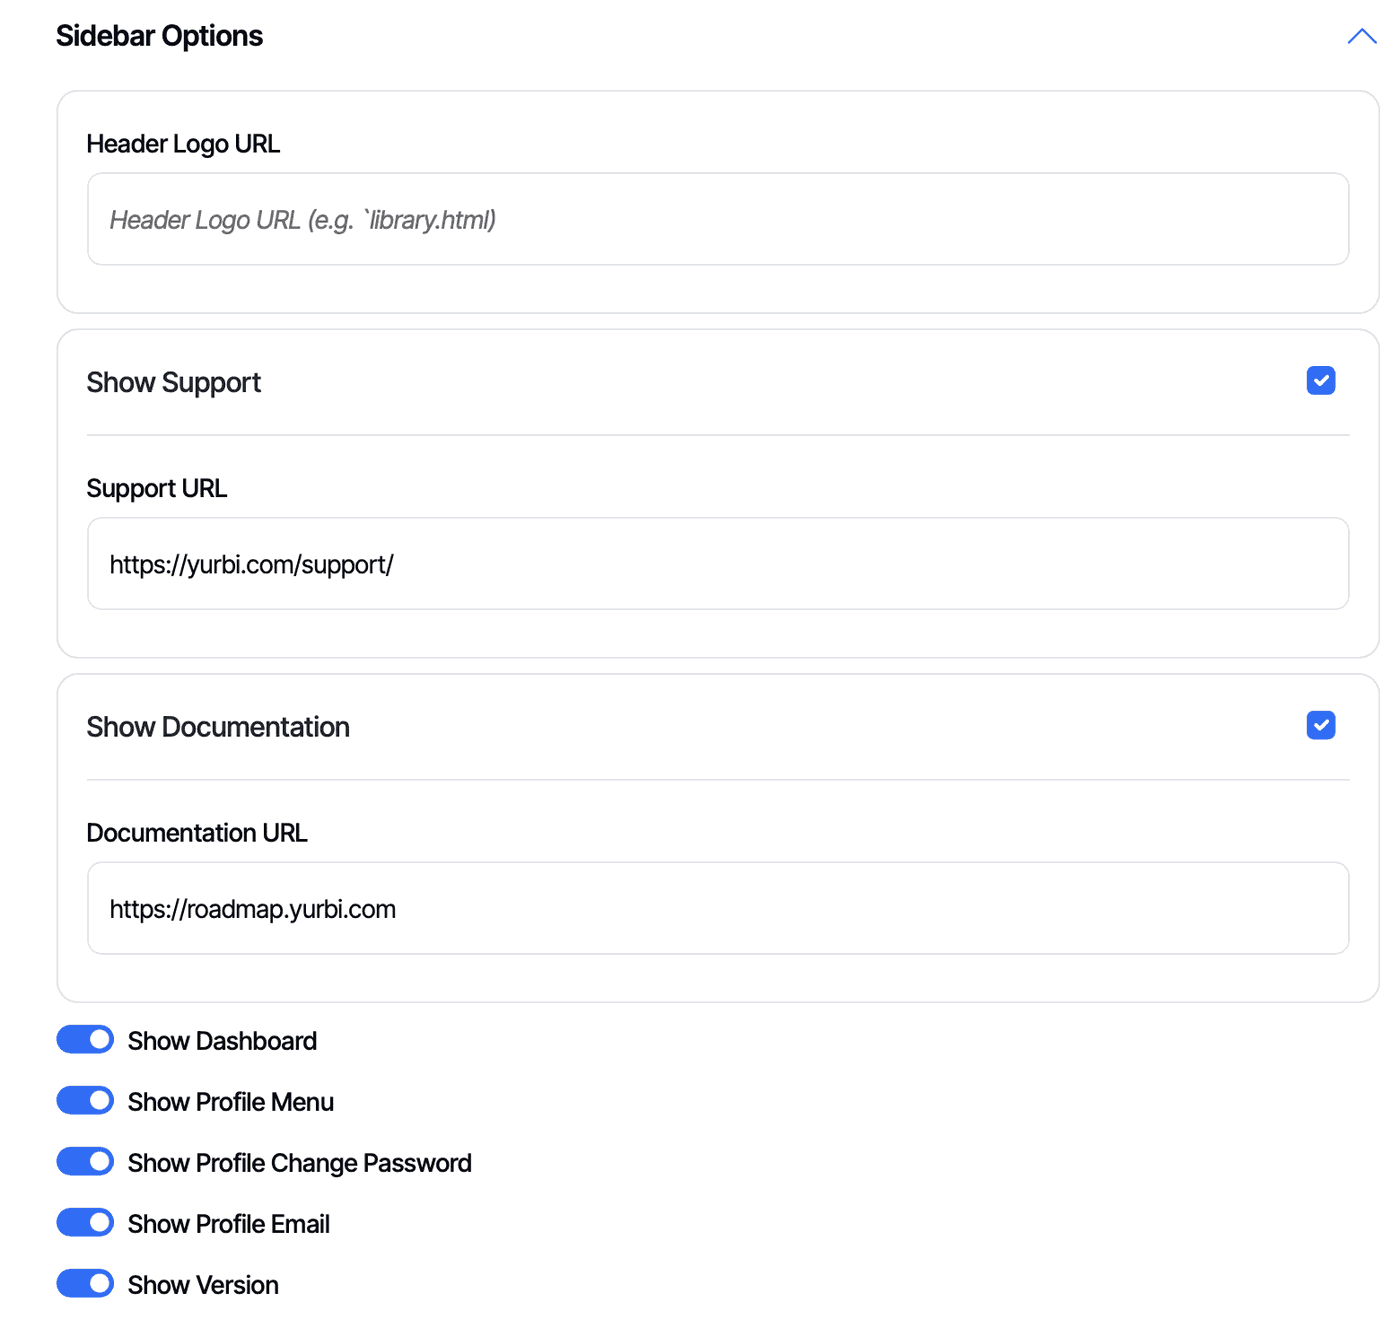
Sidebar Options control the navigation and links users see in the main DashboardFox sidebar.
Header Logo URL Enter a URL to redirect users when they click your logo. This is perfect for routing them back to your company intranet or main portal.
Show Support Toggle ON to display a Support link in the sidebar. When enabled, you can customize:
- The link URL (point to your IT support system or help desk)
- The link text (e.g., "Get Help," "Contact IT Support")
Show Documentation Toggle ON to display a Documentation link. When enabled, customize:
- The link URL (point to your internal help docs or training materials)
- The link text (e.g., "User Guide," "Help Center")
Additional Toggles (all ON by default):
- Show Dashboard - Display Dashboard section in sidebar
- Show Profile Menu - Show the user profile menu
- Show Profile Change Password - Display password change option
- Show Profile Email - Show user's email in profile
- Show Version - Display DashboardFox version information
Dashboard Options
These settings control what features are available when users interact with dashboards. By default, all options are enabled.
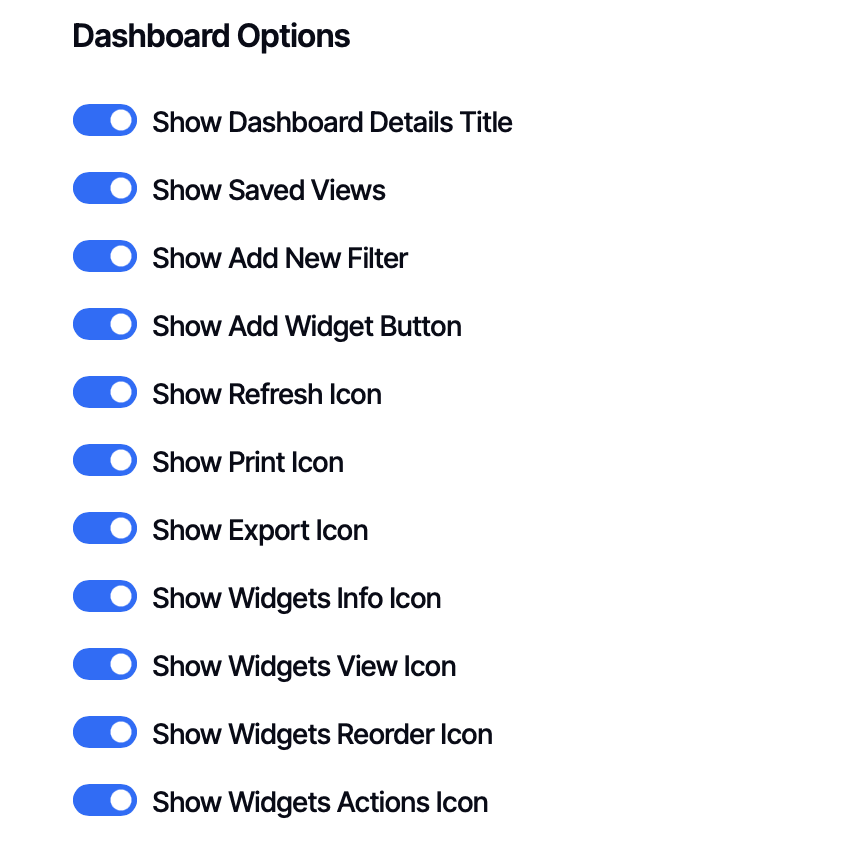
Available Options:
- Show Dashboard Details Title - Display the dashboard name
- Show Save This View - Allow saving customized dashboard views
- Show Saved Views - Access previously saved views
- Show Add New Filter - Enable adding filters
- Show Refresh Icon - Display refresh button
- Show Print Icon - Enable printing
- Show Export Icon - Allow exporting
- Show Favorite Icon - Show the favorite/star button
- Show Create Dashboard Button - Display button to create new dashboards
- Show Dashboard Search Section - Show the search functionality
- Show Add Widget Button - Allow adding new widgets
- Show Widgets Info Icon - Display widget information
- Show Widgets View Icon - Show widget viewing options
- Show Widgets Reorder Icon - Enable drag-and-drop reordering
- Show Widgets Actions Icon - Display widget actions menu
Global vs. Per-Dashboard: Configuring options here applies them globally for all users in this policy. However, you can also configure these settings on a per-dashboard basis for more granular control.
If you want certain dashboards to have specific settings, leave the global options enabled here, then turn them off for individual dashboards as needed. You cannot enable a feature on a dashboard if it's disabled in the branding policy.
Library Options
Library Options control the Library interface and report viewing experience.
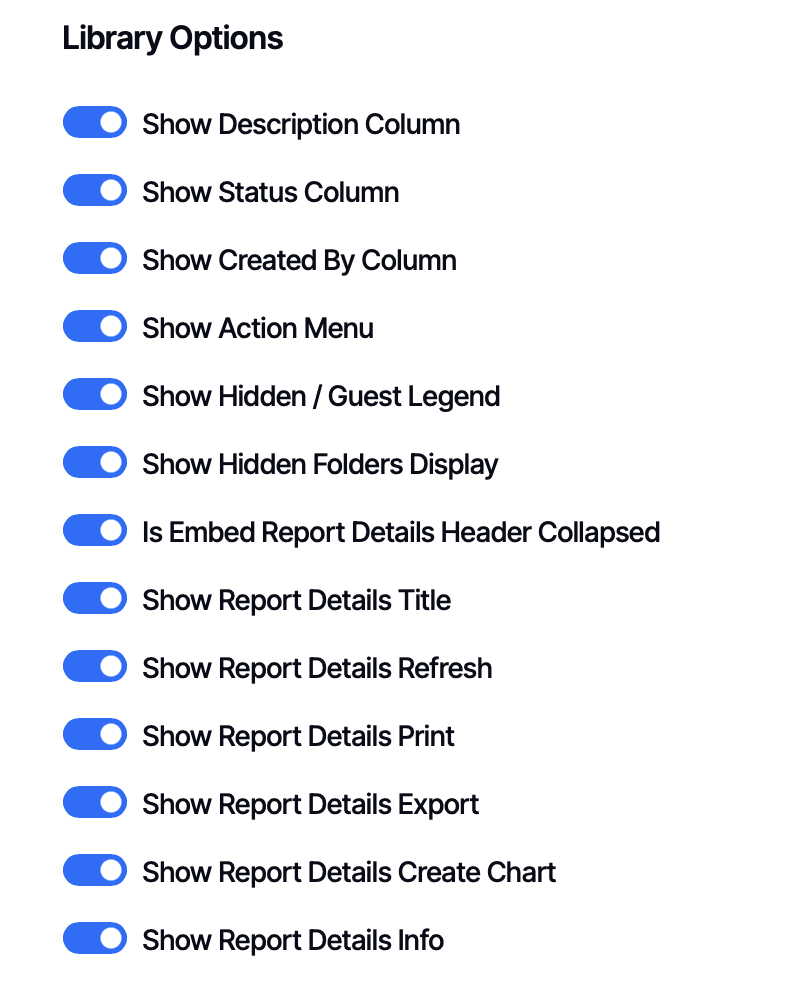
Library Display Options:
- Show Private Library - Display users' private library section
- Show Favorites Library - Display favorited items section
- Show Description Column - Show report descriptions in lists
- Show Status Column - Display report status
- Show Created By Column - Show who created each report
- Show Action Menu - Display the actions menu for reports
- Show Hidden / Guest Legend - Show legend explaining icons
- Show Hidden Folders Display - Display hidden folders
Report Details Options:
These apply when users view reports within the application:
- Is Embed Report Details Header Collapsed - Start with header collapsed
- Show Report Details Title - Display the report name
- Show Report Details Refresh - Show refresh button
- Show Report Details Schedule - Display scheduling options
- Show Report Details Print - Enable printing
- Show Report Details Export - Allow exporting
- Show Report Details Create Chart - Show visualization builder
- Show Report Details Info - Display report information
Note: These same report detail options also appear in the Embedded Report and Dashboard Branding section. The difference:
- Library Options here: Apply when viewing reports in the full DashboardFox application
- Embed Report Options: Apply when reports are embedded in your portal or intranet
You might show the Create Chart builder in the full application but hide it in embedded views for simplicity.
Embed Dashboard Options
These control what features are available when dashboards are embedded. For detailed information about embedded branding strategy, see the Embedded Report and Dashboard Branding article.
Quick Summary: All options are enabled by default. You can hide features in embedded dashboards while keeping them visible in the full application - creating a simplified embedded experience while providing full power to users who access DashboardFox directly.
Available Options:
- Show Embed Dashboard Details Title
- Show Embed Save This View
- Show Embed Saved Views
- Show Embed Add New Filter
- Show Embed Refresh Icon
- Show Embed Print Icon
- Show Embed Export Icon
- Show Embed Add Widget Button
- Show Embed Widgets Info Icon
- Show Embed Widgets View Icon
- Show Embed Widgets Reorder Icon
- Show Embed Widgets Actions Icon
Embed Report Options
These control report features when embedded. See Embedded Report and Dashboard Branding for complete details.
Available Options:
- Is Embed Report Details Header Collapsed
- Show Embed Report Details Title
- Show Embed Report Details Refresh
- Show Embed Report Details Print
- Show Embed Report Details Export
- Show Embed Report Details Create Chart
- Show Embed Report Details Info
Advanced Customizations

Advanced Customizations give you unlimited flexibility to extend DashboardFox's interface with your own code.
Custom CSS Add custom stylesheets to modify appearance beyond the standard options. Perfect for:
- Fine-tuning colors and spacing
- Matching exact brand guidelines
- Hiding or styling specific elements
Custom JS (JavaScript) Add interactive functionality or integrate with external tools:
- Analytics tracking (Google Analytics, Mixpanel, etc.)
- Chat widgets or support tools
- Custom behaviors and automation
- Integration with your intranet or applications
Custom HTML Inject additional HTML content:
- Custom headers or footers
- Disclaimer text
- Additional navigation elements
- Embedded widgets or content
Example - Session Timeout Handling:
Redirect users if their session expires during embedded use:
custom_handleexpired_session = function() {
  window.location = "./index.html";  // Redirect to your intranet
};
When Changes Take Effect
Important: Application Branding policies are applied when users log in.
After creating or updating a branding policy, users must log out and log back in to see the changes. The branding is loaded at login time and remains active throughout the session.
Testing tip: When testing branding changes, always log out completely and log back in rather than just refreshing the page.
Common Configuration Scenarios
Scenario 1: Organization-Wide Branding
Goal: Consistent branding for all employees
- Create one policy named "Company Standard"
- Assign to ALL USERS
- Set your corporate colors and logos
- Leave most features enabled for flexibility
- Hide features you don't support (like scheduling if not configured)
Scenario 2: Mixed User Base
Goal: One policy serving different user types
Since you have one policy assigned to everyone, configure it for the most common use case:
- Enable features that most users need
- Hide advanced features that only power users need (they can access the full app)
- Balance simplicity with functionality
Note: If you need truly different configurations for different departments, contact team@dashboardfox.com about licensing additional policies.
Scenario 3: Read-Only vs. Analysts
Goal: Different features for viewers vs. creators
With a single policy, you might:
- Enable viewing features for everyone
- Use DashboardFox's permission system to control who can create/edit
- Hide builder-related options if most users are read-only
Alternative: License multiple policies to create separate experiences for readers and analysts.
Scenario 4: Internal Team + External Partners
Goal: Same branding, but maybe different features
With one policy:
- Assign to ALL USERS for consistent look
- Use DashboardFox permissions to control what partners can access
- Configure features based on most common needs
Alternative: License additional policies to create distinct experiences for internal vs. external users.
Managing Your Branding Policy
Editing Your Policy
You can edit your branding policy at any time. Changes take effect after users log out and back in.
Creating a New Policy
If you need to create a completely new policy and already have one:
- Navigate to your existing branding policy
- Either disable it (toggle Active Status off) or delete it
- Create your new policy
- Have users log out and back in to see changes
Temporarily Disabling Branding
Toggle Active Status to OFF to temporarily disable the policy without deleting it. Users will see default DashboardFox branding until you re-enable the policy.
Best Practices
Start Comprehensive: With one policy serving all users, start with most features enabled and progressively hide features that aren't being used or cause confusion.
Document Your Configuration: Keep notes about why specific features are enabled/disabled, especially if multiple admins manage DashboardFox.
Test Changes: Before rolling out branding changes, test with a representative user to ensure everything works as expected.
Consider Screen Space: The full DashboardFox application has more room for features than embedded views - take advantage of this differentiation.
Match Your Brand: Make sure colors, logos, and terminology align with your organization's brand guidelines.
Review Regularly: As your organization's needs change, review branding configuration to ensure it still aligns.
Image Requirements
When uploading logos:
- Supported formats: JPG, PNG, SVG
- Not supported: WebP
- Recommendation: Use PNG or SVG for best quality at different sizes
- Size: Provide high-resolution images; DashboardFox will scale appropriately
Need More Policies?
If your organization would benefit from multiple branding policies for different departments, external partners, or user groups, additional policies are available with licensing upgrades. Examples of multi-policy scenarios:
- Finance Department with export enabled; other departments without
- Executive dashboards with simplified controls; analyst dashboards with full features
- External partners with restricted features; internal team with full access
- Different subsidiaries or divisions with their own branding
Contact team@dashboardfox.com to discuss your requirements and licensing options.
Remember: Branding is loaded at login. Have users log out and back in to see changes take effect.