How to configure Mail Settings
Version: DashboardFox v12
Role: Admin or higher
Permission: Admin or higher
Note: This article covers mail settings for on-premise installs. For DashboardFox Cloud, see “SMTP Mail Settings.”
Overview
When scheduling a report or dashboard, the user may encounter an error require to have an email address. Here are the steps on how to address them.
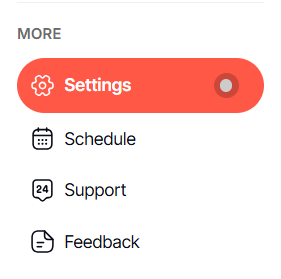
Step 1: Access Settings
Click Settings to open the configuration menu.
Step 2: Open Scheduler
Select Scheduler from the menu options.


Step 3: Enter Mail Settings
Click Mail Settings to access email configuration options.


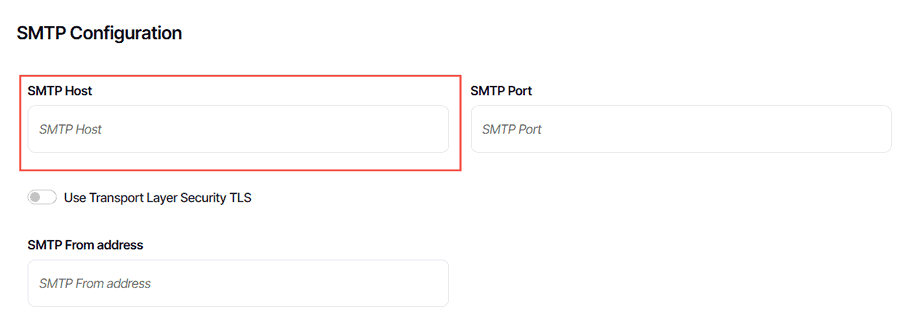
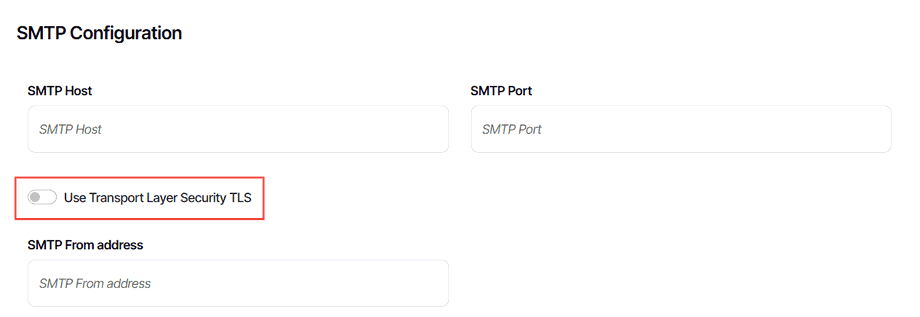
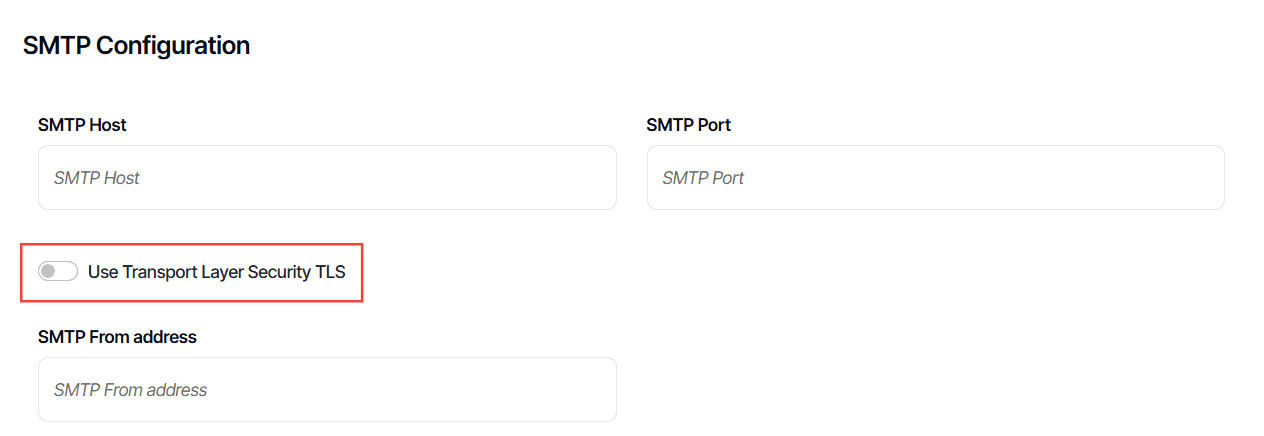
Step 4: Configure SMTP Settings
Enter SMTP Host:
Type in the SMTP Host (your email gateway of the SMTP server).
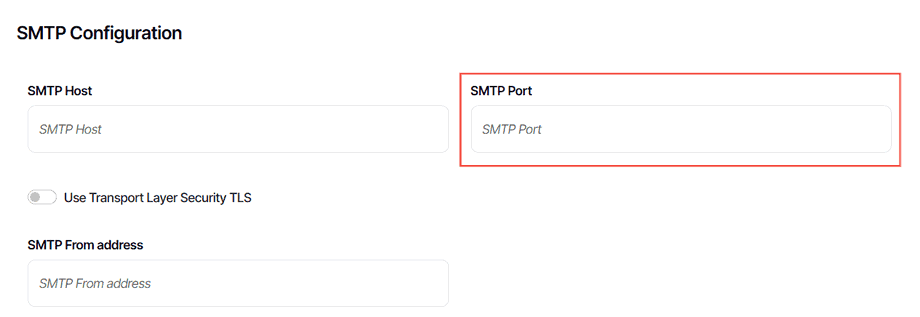
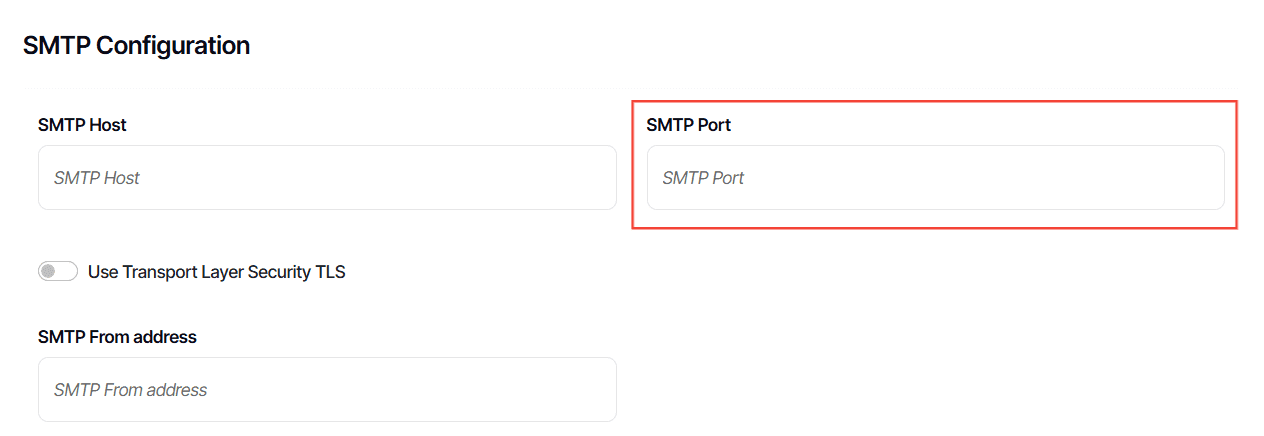
Enter SMTP Port:
Input the SMTP Port (default is usually 587).

Step 5: Manage TLS Settings
Toggle TLS:
If your server requires it, enable Transport Layer Security (TLS) by toggling the button on.
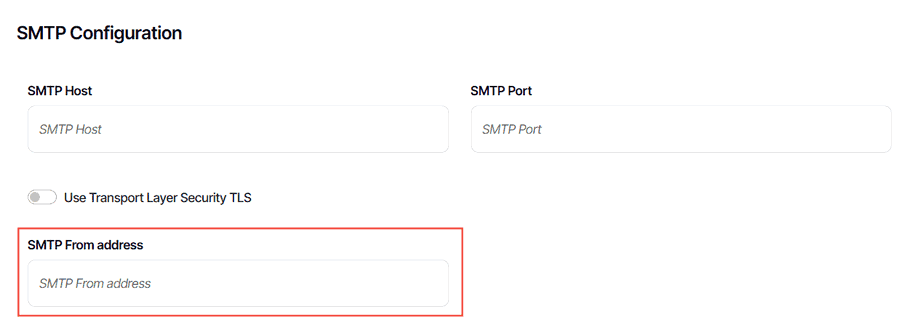
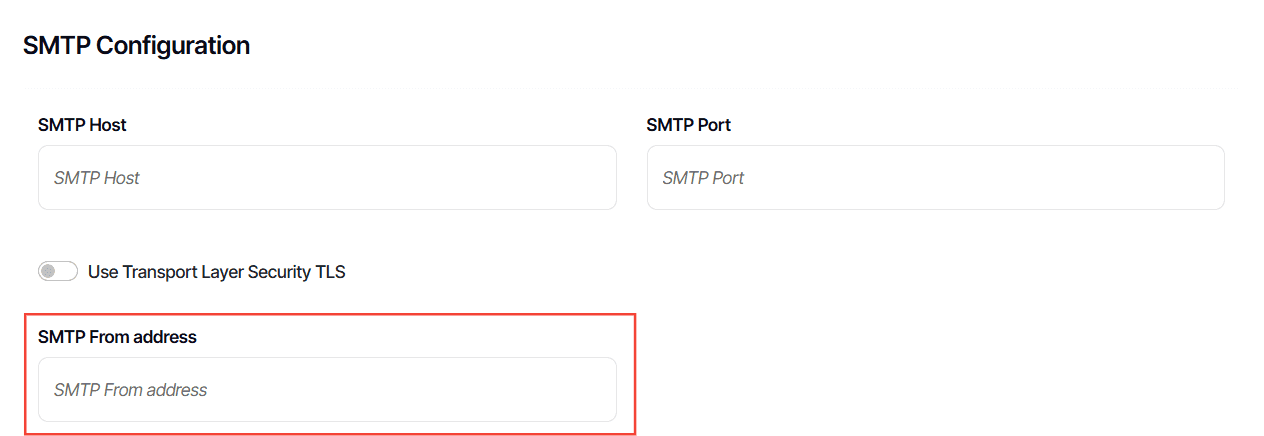
Step 6: Configure the Email Sender Details
Enter SMTP From Address:
This is the email address that will appear in the 'From' field of the emails.
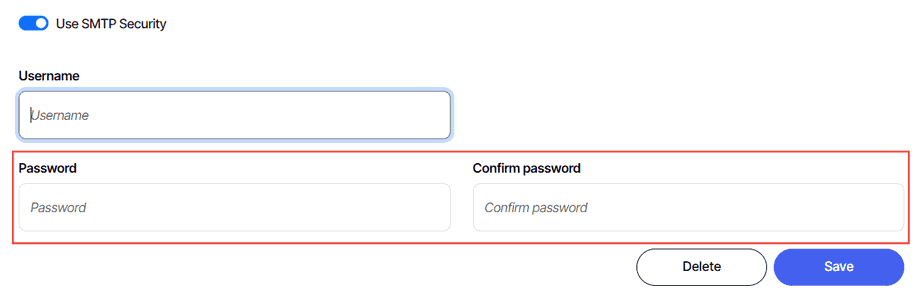
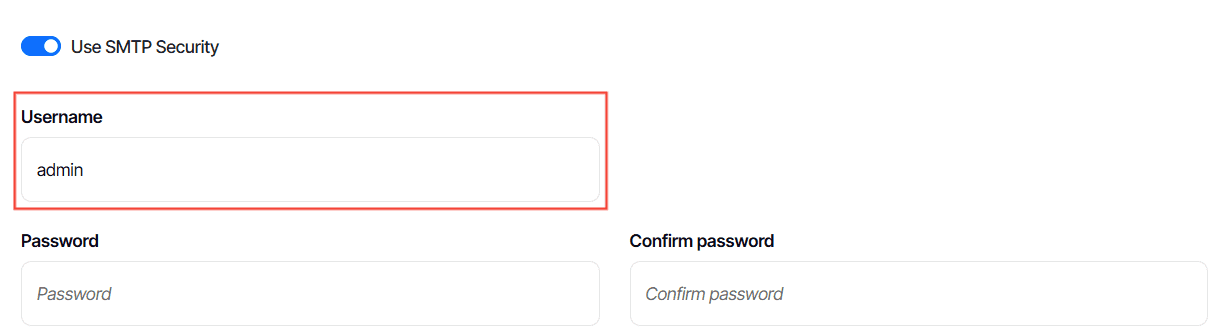
Step 7: Enable and Setup SMTP Security
Toggle Use SMTP Security:
Activate this feature if required by your email server.
Enter Username:
Input your email server username for a secure connection.
Enter and Confirm Password:
Type in your password and confirm it to establish the secure connection.


Step 8: Save configuration
Click Save
And there you have it! You now know how to configure your mail settings!