How to create a new dashboard filter
Version: DashboardFox v12
Role: Agent and higher
Permission: Agent with view permission to the dashboard
Overview
A dashboard filter is your personal tool for focusing on the data that matters most to you. It is like having a magnifying glass for your reports, allowing you to highlight specific areas of interest.
Imagine you only want to see data from a specific time period, like This Month, or perhaps from particular locations. A dashboard filter can narrow down your report to show only those relevant details
All images shown are just an example. Names, fields, and values will be dependent on the organization and the user logged in
Creating a Filter
1. Click on Add Filter, located below the dashboard name.

2. Name your filter – Give it a meaningful name to identify it easily later.

3. Select the type of filter

THREE TYPES OF FILTER
- Date/Time – Useful for filtering data based on a specific date and time.
- Numeric – Allows you to use numbers to filter out data.
- Text – Suitable for finding data within a certain defined criterion.
4. Under Select Fields, tick off the field you want to filter
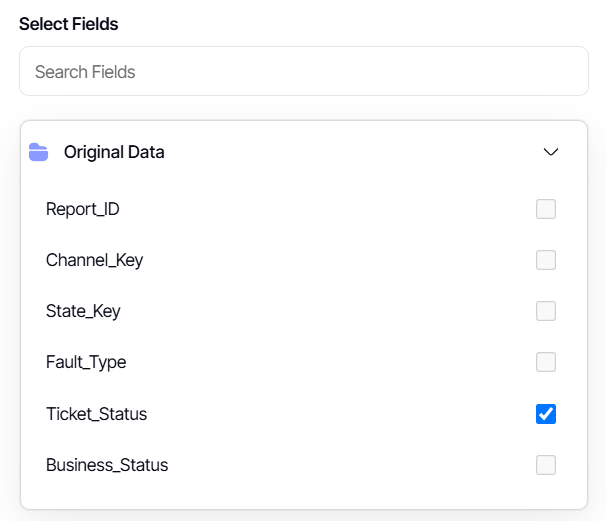
5. You can also use the search box so locate the field.

Note: A single filter can only apply to 1 field per report.
6. Choose your operator – This refers to the rule applied to filter data.
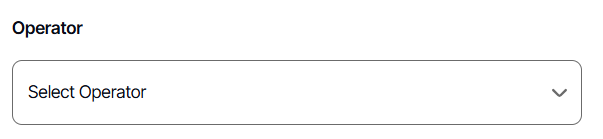
Here are what each operator means:
Equal – The filtered data should match the search string.
Between – The filtered data should be within two defined criteria.
Greater Than – The filtered data should be more than the searched number. Applies only to numeric data.
Less Than – The filtered data should be less than the searched number. Applies only to numeric data.
In List – You can manually pick from a dropdown list of data.
Like – You can search for data that matches a specified pattern.
7. Under Filter Permissions, by default, the Filter Index is filled.
This field denotes the order of your filters. Modify this number when you want to reorder your filters.

8. Finally, click Save & Apply to create and store the filter.

And there you have it! You can now create filters for your dashboard!